Prerequisites
- A White-Label app configured in SalesMind AI
- Admin access to your Stripe Dashboard
- Basic familiarity with Stripe Products and Prices
Overview: What You Can Configure
- Enable or disable free trials
- Set trial duration (e.g. 7 days)
- Require or skip credit card validation during trial
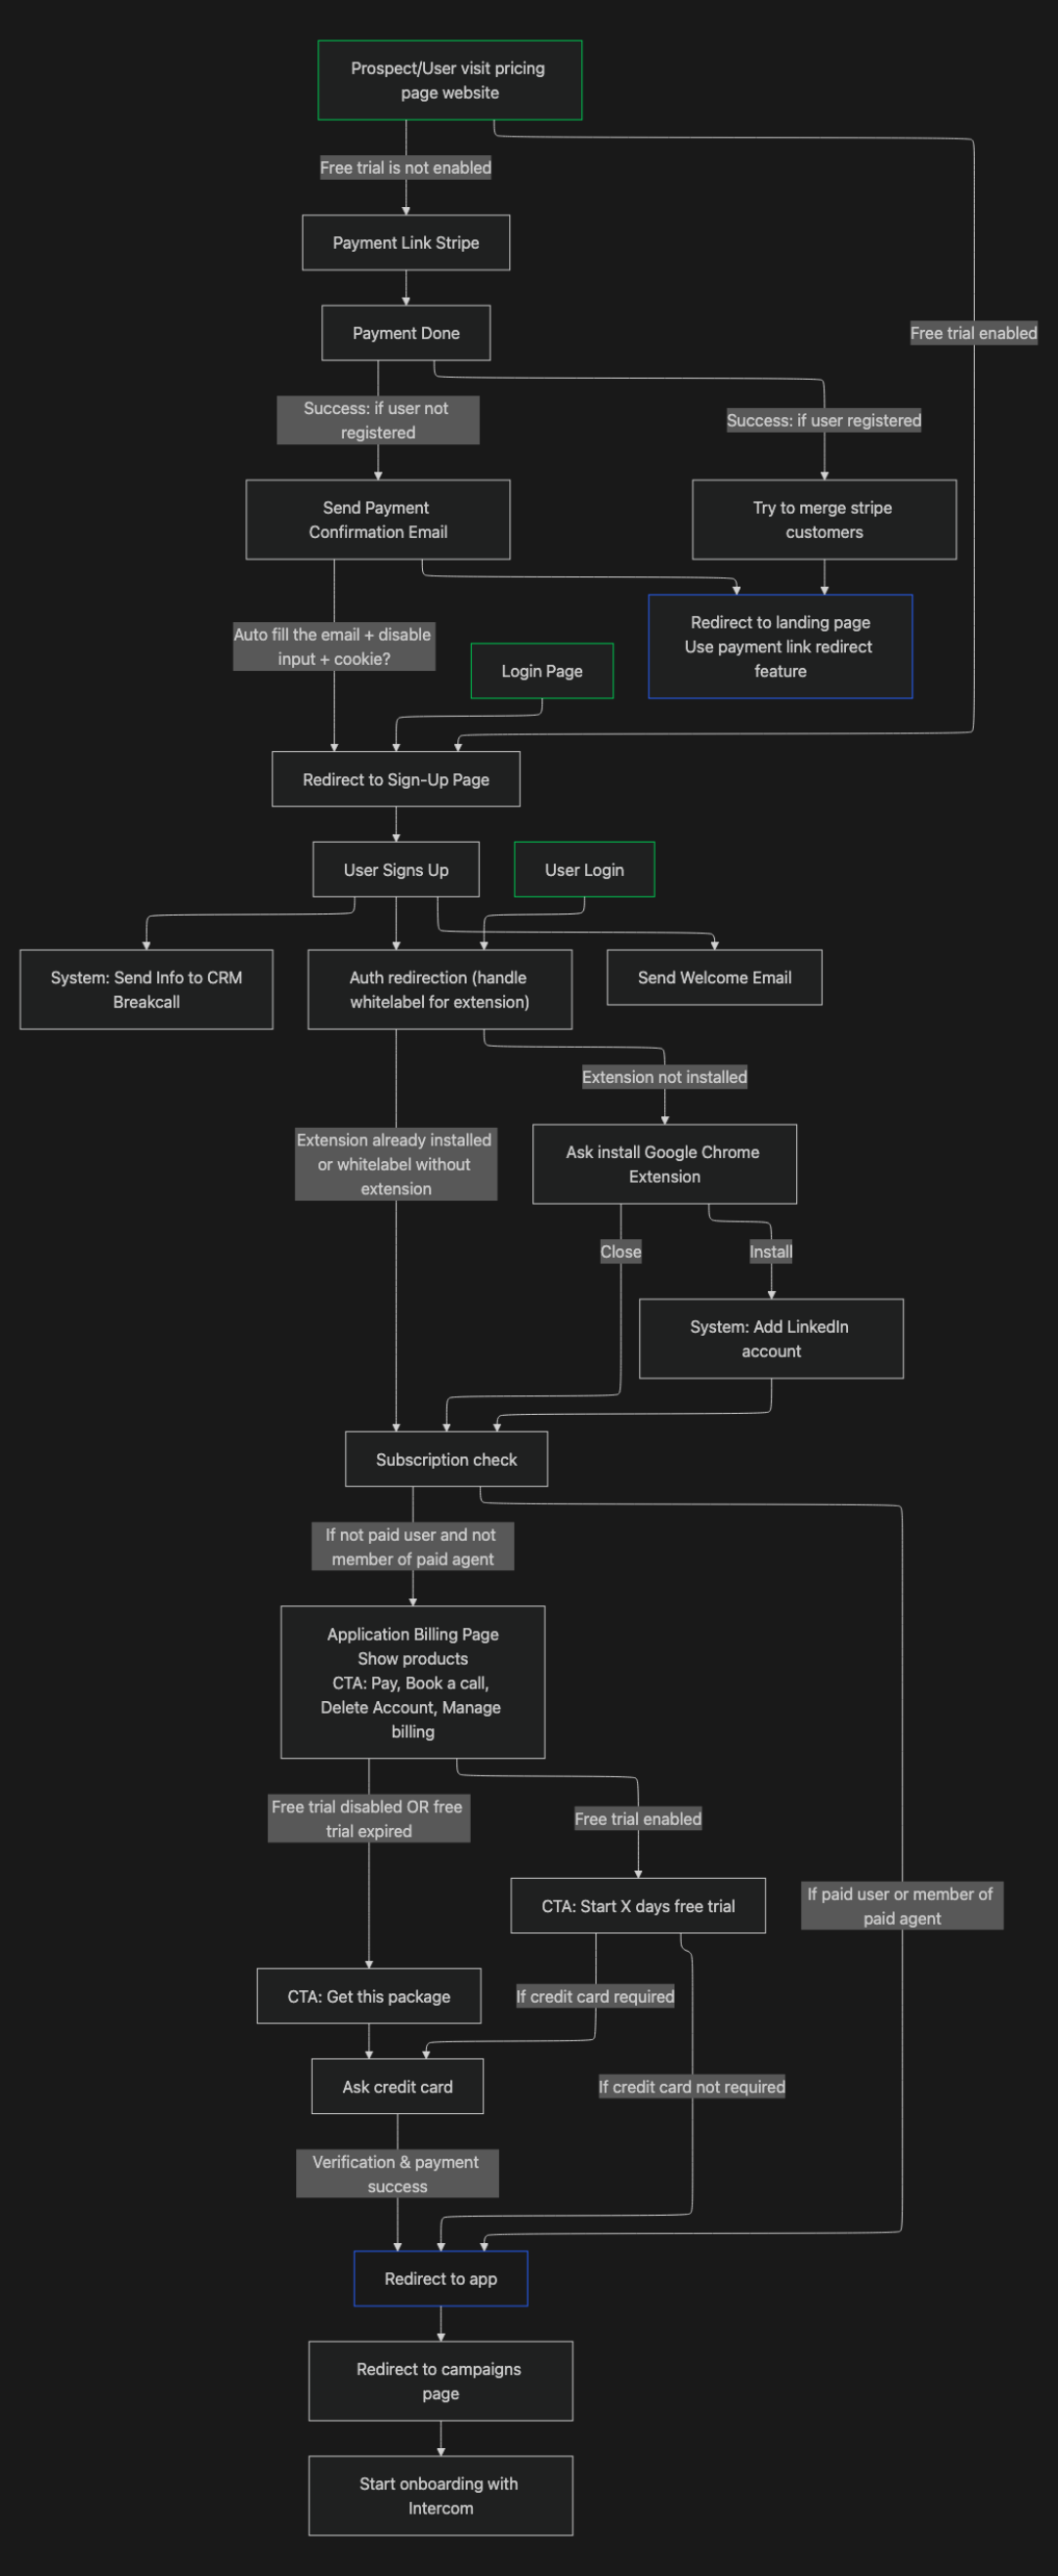
The onboarding funnel moves customers through:
Website → Registration → Payment (Stripe)
Step 1: Set Up a Product and Price in Stripe
Your app uses Stripe metadata to determine how many seats to assign per subscription.
- Open your Stripe Products dashboard.
- Create or open a Product.
- In Product Metadata, add:
- Key:
type/ Value:subscription - Key:
seats/ Value: number of seats (e.g.5)
- Key:
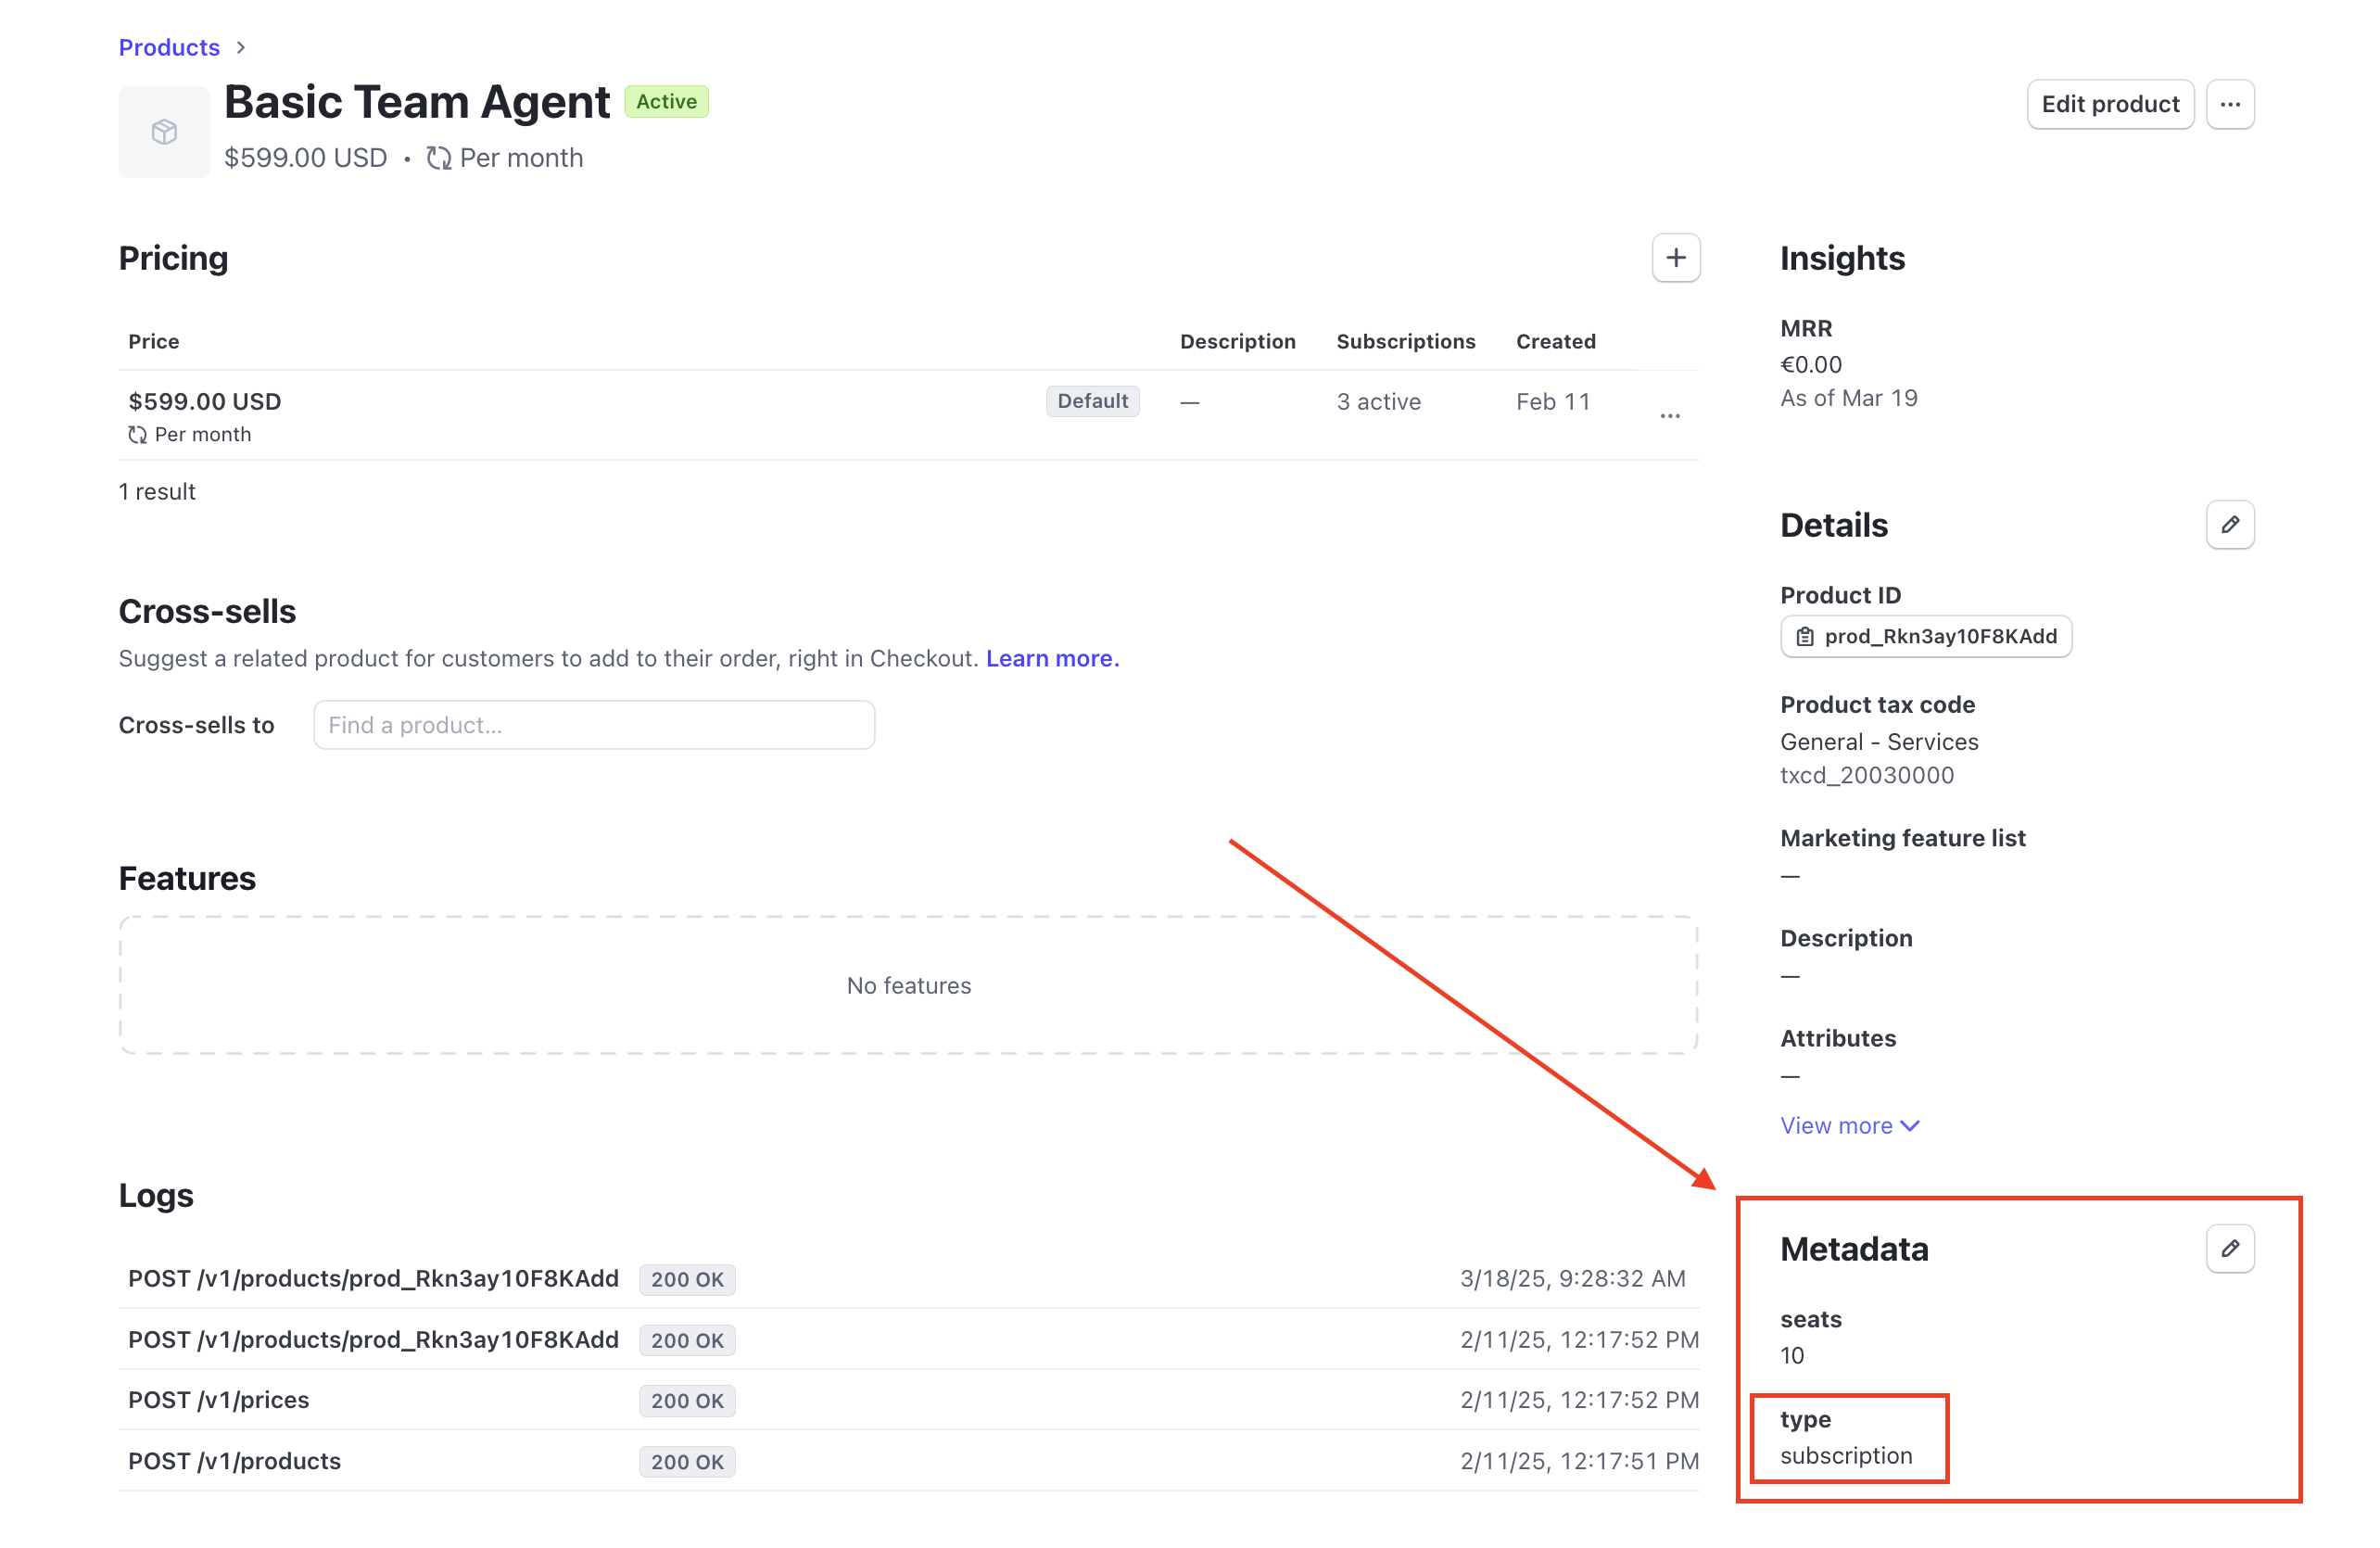
⚠️ Warning: Without the
seatsmetadata, seats won't be provisioned automatically after payment.
Step 2: Add a Price to Your Product
Every product needs at least one price. Add it in Stripe, then configure the Price Metadata fields below.
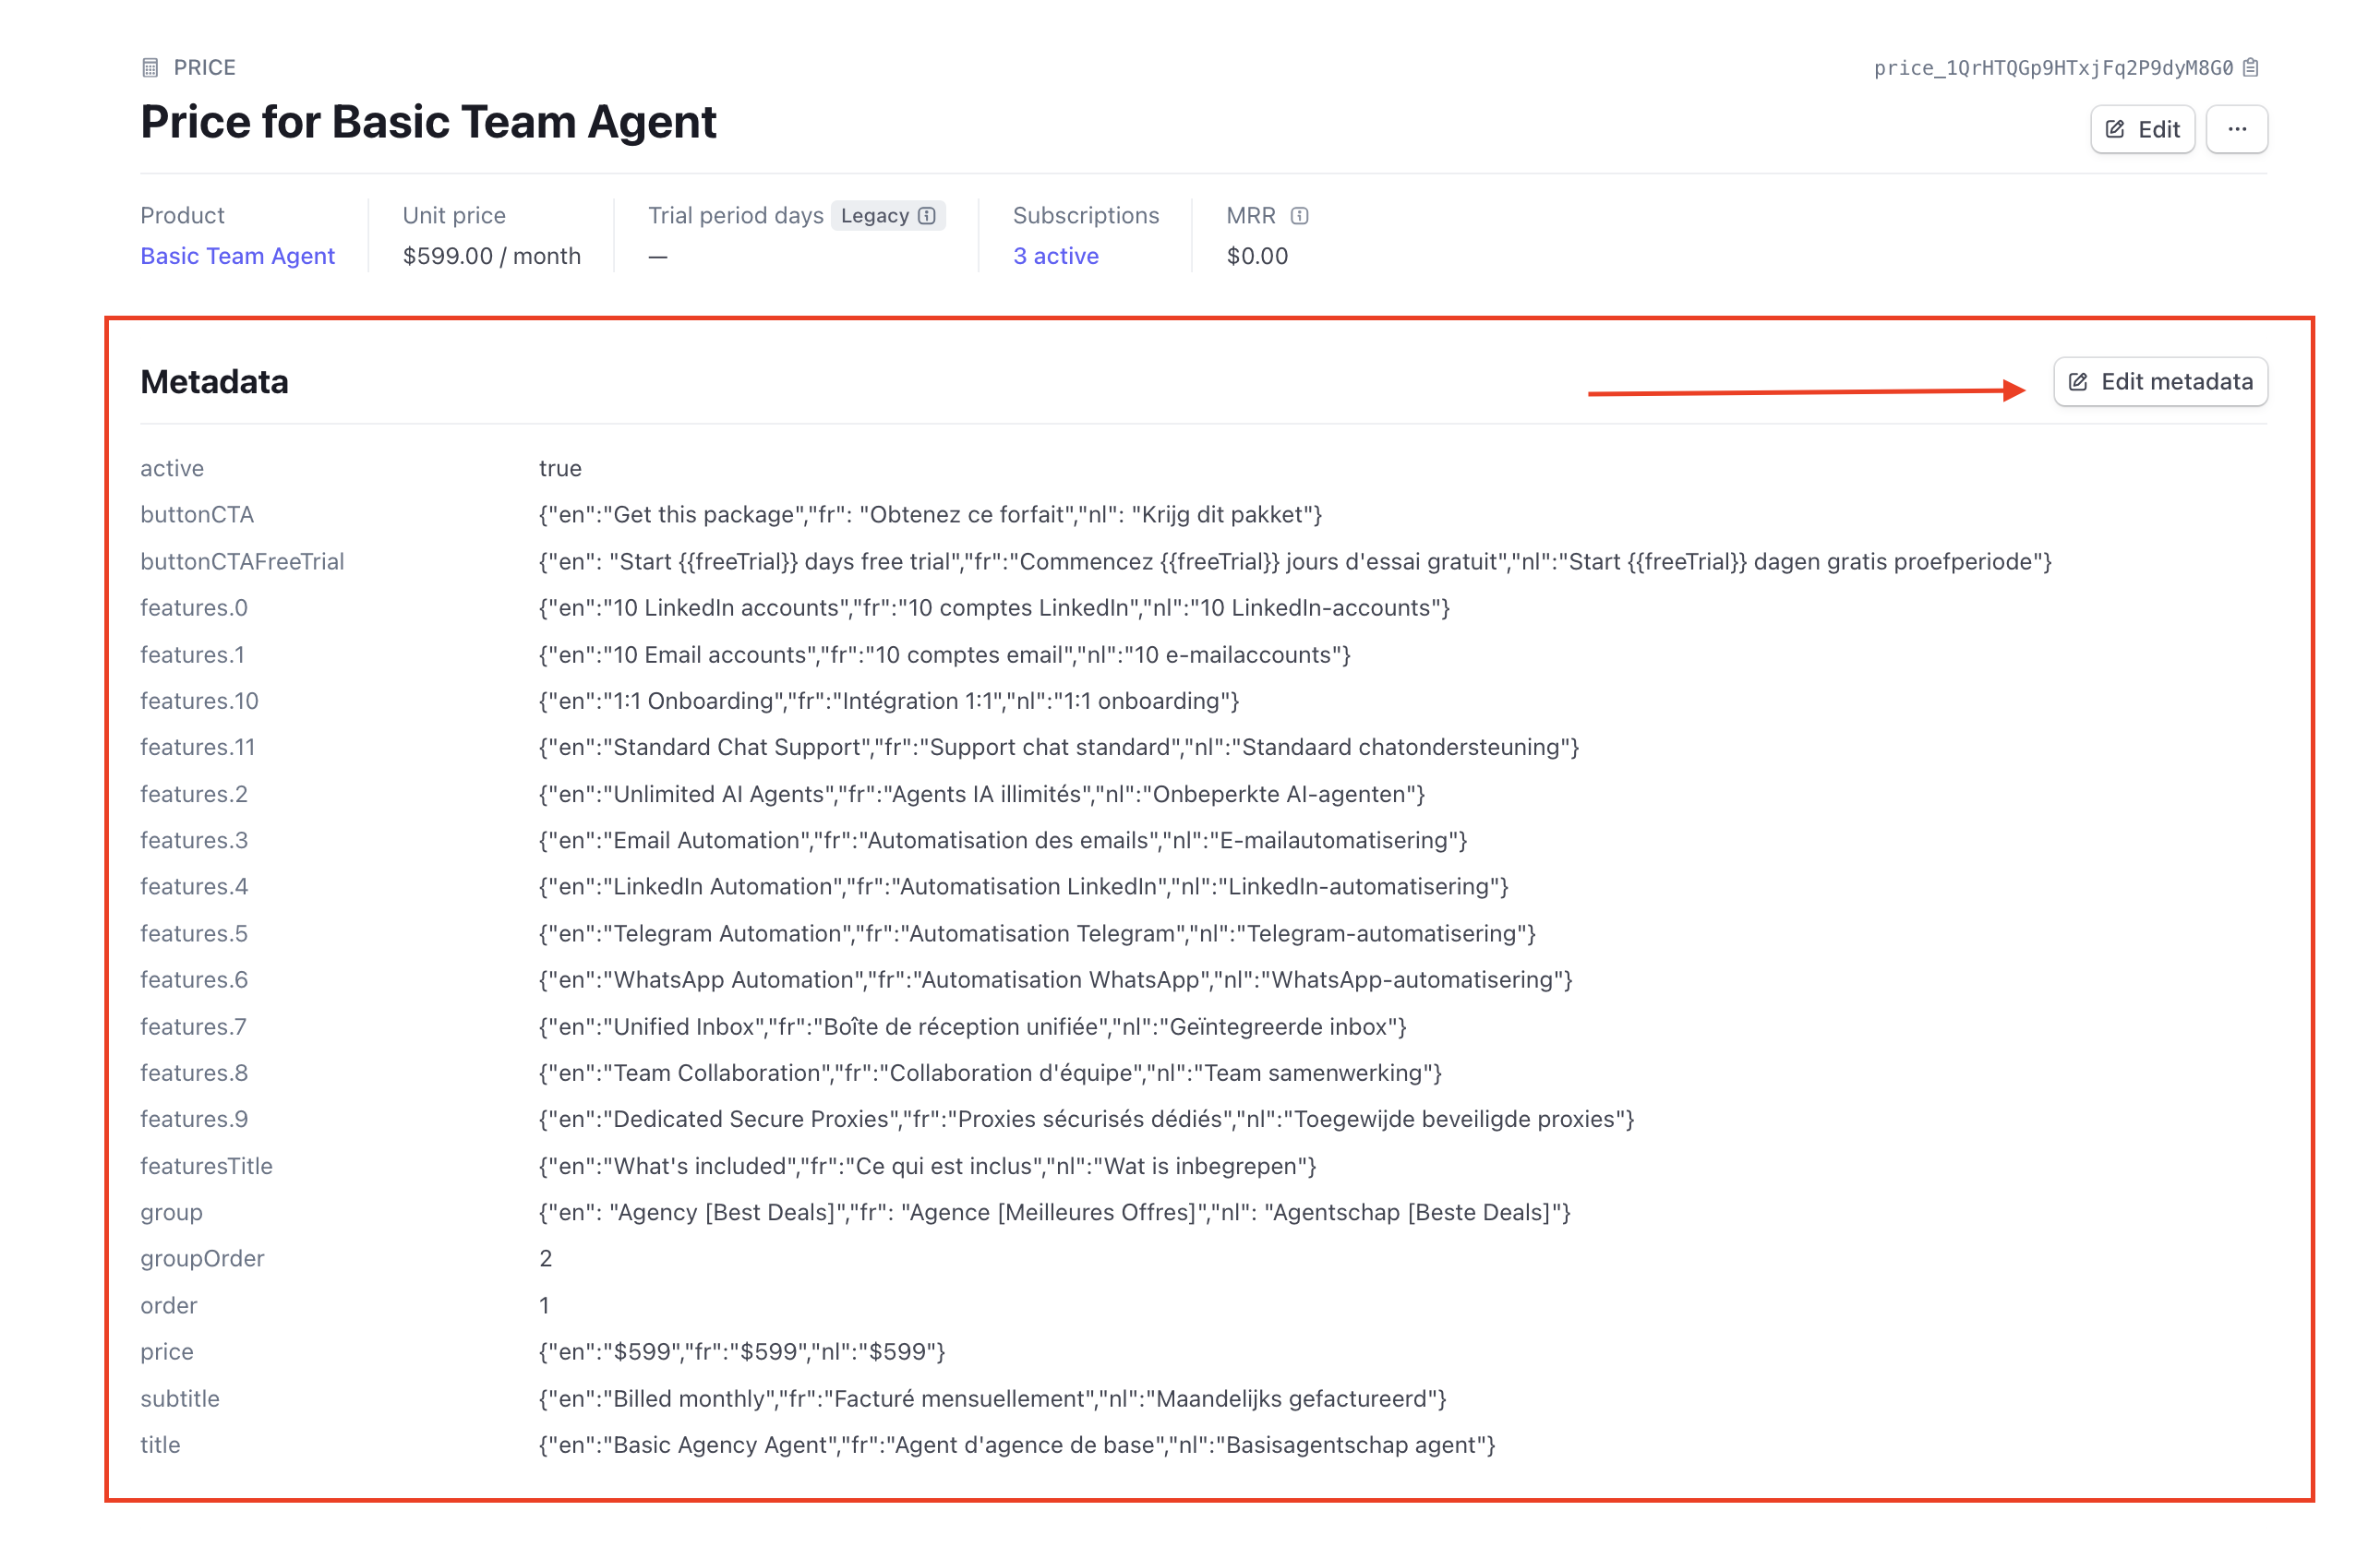
Only products with type = subscription in their metadata will appear on your app's billing page.
Price Metadata Reference
Use these keys in your Stripe Price metadata to control how plans display in your app:
| Field | Type | Description | Example |
|---|---|---|---|
active | Boolean | Show or hide this price | true |
buttonCTA | JSON | Subscribe button text | { "en": "Subscribe Now", "fr": "S'abonner" } |
buttonCTAFreeTrial | JSON | Button text with trial duration | { "en": "Start {{freeTrial}} Free Trial" } |
colored | Boolean | Highlight this plan card | true |
features.0 | JSON | First feature line | { "en": "Access to all courses" } |
features.1 | JSON | Second feature line | { "en": "Priority support" } |
features.2 | JSON | Third feature line | { "en": "Cancel anytime" } |
featuresTitle | JSON | Features section heading | { "en": "What's included" } |
group | JSON | Category tab label | { "en": "Business [Best Deal]" } |
groupOrder | Number | Order of groups | 1 |
order | Number | Card order within a group | 2 |
price | JSON | Displayed price text | { "en": "$199 / month" } |
subtitle | JSON | Short plan description | { "en": "Best for startups" } |
title | JSON | Plan title | { "en": "Business 1 Month" } |
👉 Note: All JSON values must be valid. Invalid JSON will break translations. Stripe syncs metadata to your app in real time via Firestore.
Removing a Metadata Field Safely
Deleting a field incorrectly can leave stale data showing in your app. Follow this order:
- Edit the price metadata in Stripe.
- Set the field value to
nulland save. - Edit again, delete the field entirely, then save.
⚠️ Warning: Skipping step 2 may cause the front-end to keep displaying outdated data.
Use AI to Generate Metadata JSON
You can use any AI assistant to generate multilingual metadata quickly. Use this prompt:
Translate and format the following pricing details into JSON for English (en), French (fr), and Dutch (nl). Return each field separately for easy copying.

Values to translate:
- buttonCTA: [INSERT VALUE]
- buttonCTAFreeTrial (use {{freeTrial}} as placeholder): [INSERT VALUE]
- features.0: [INSERT VALUE]
- features.1: [INSERT VALUE]
- features.2: [INSERT VALUE]
- featuresTitle: [INSERT VALUE]
- group: [INSERT VALUE]
- price: [INSERT VALUE]
- subtitle: [INSERT VALUE]
- title: [INSERT VALUE]

Format: { "en": "...", "fr": "...", "nl": "..." }
Merging Subscriptions for Mismatched Emails
Sometimes a customer pays with a different email than the one they registered with. This breaks the automatic link between Stripe and your app user. Here's how to fix it.
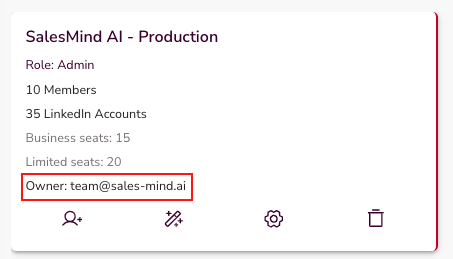
1. Find the user's UID in your app:
Go to Agents, find the user, and copy their Owner email address.
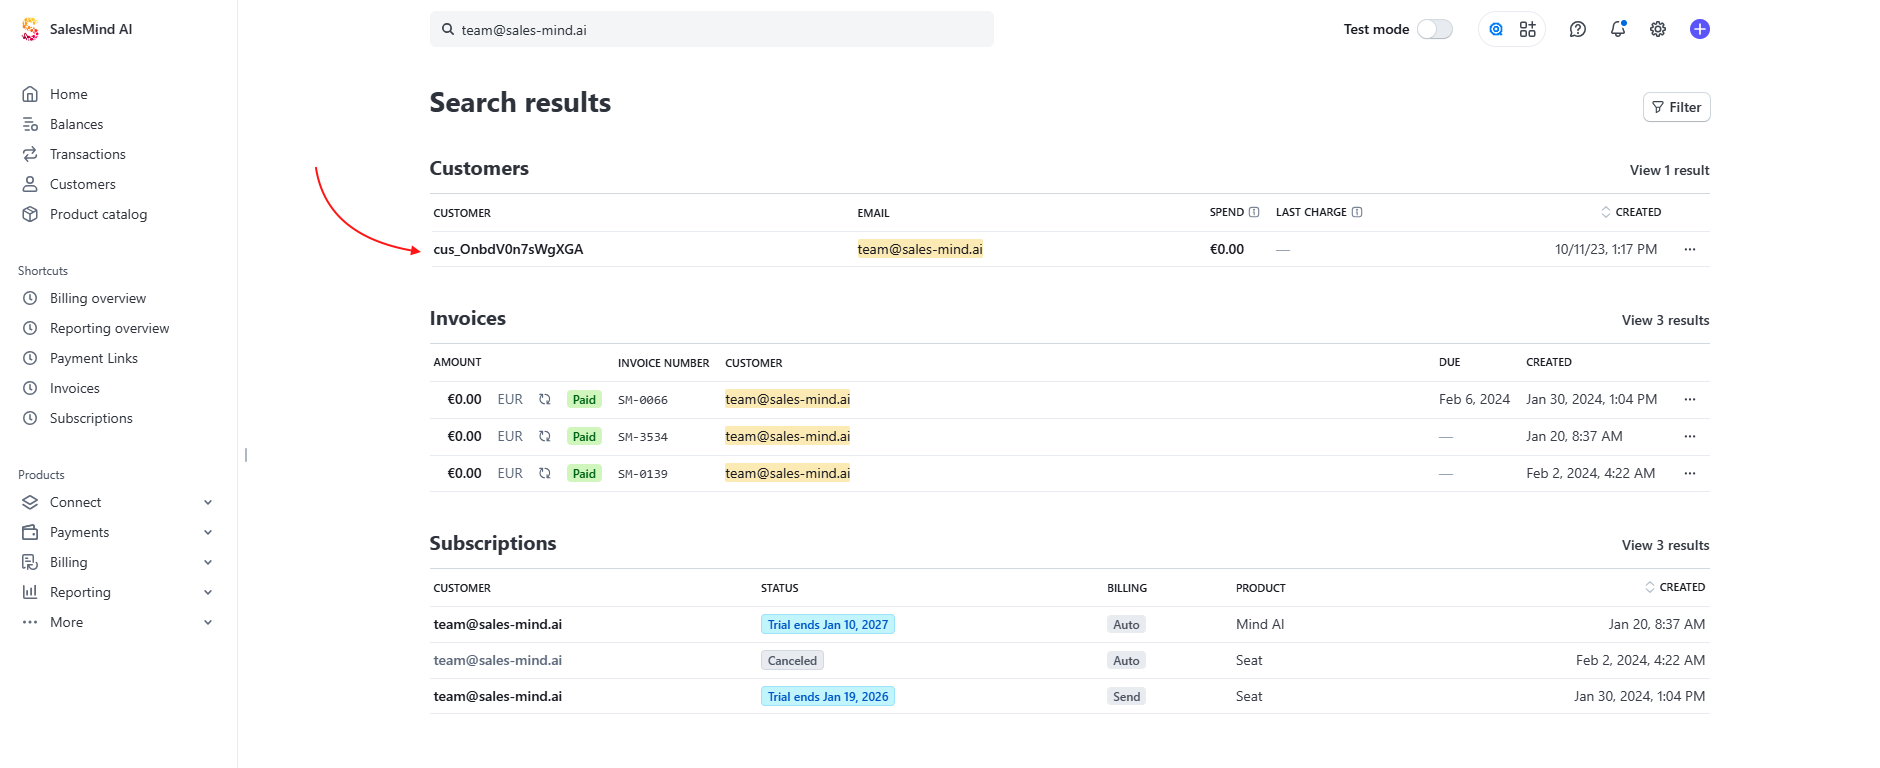
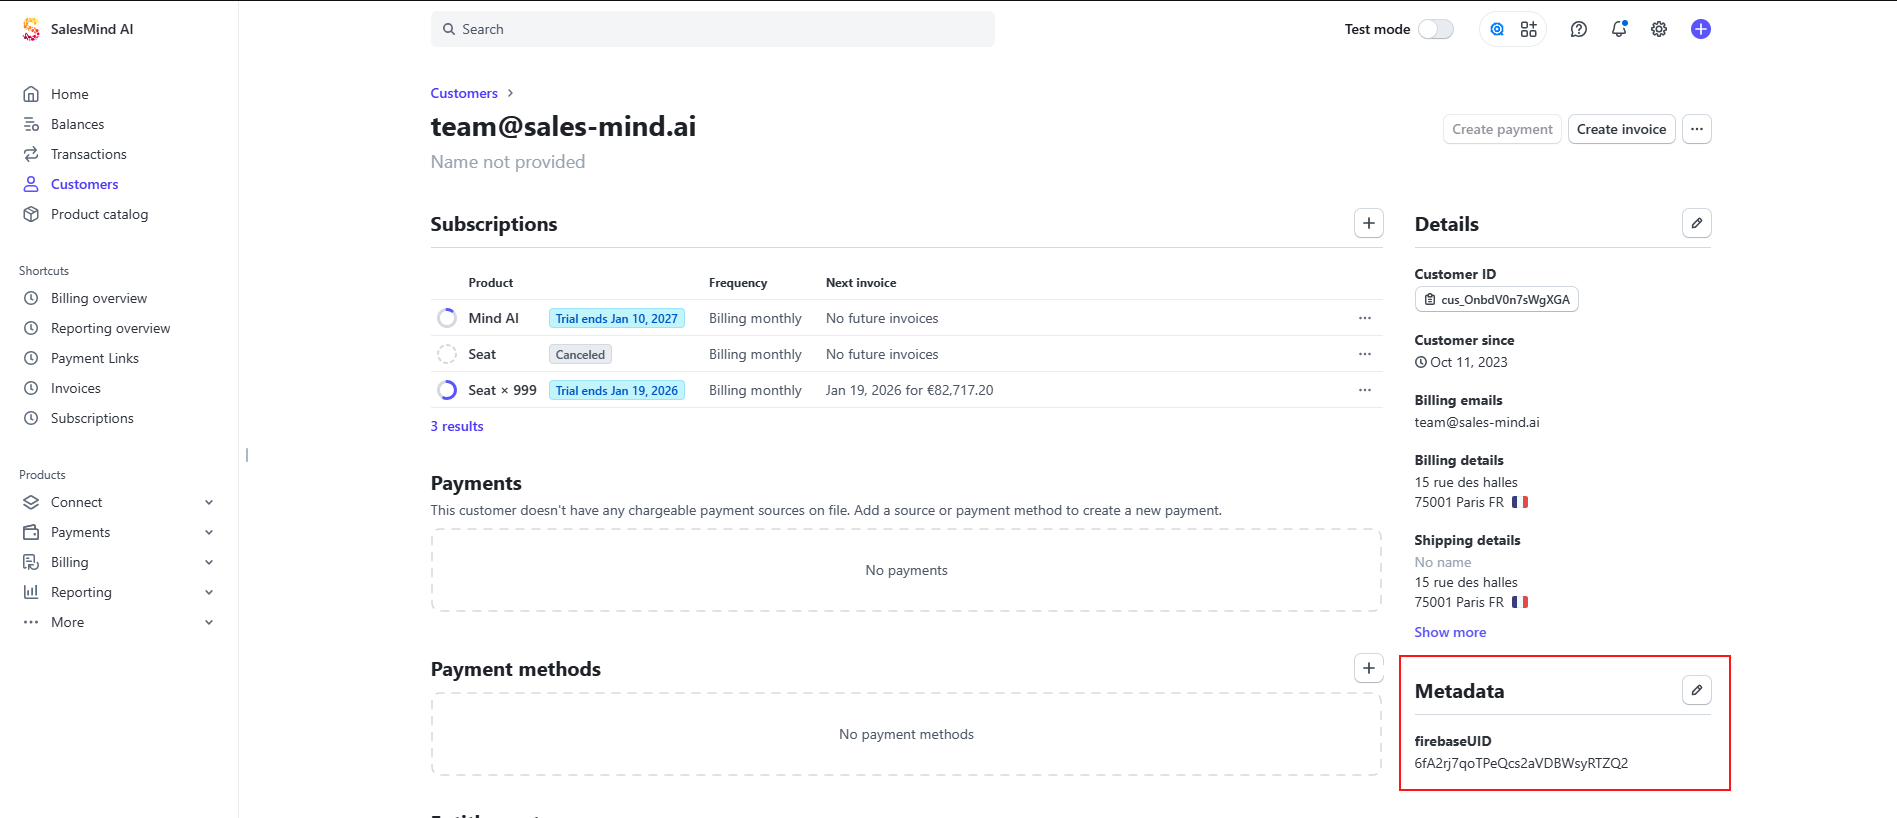
2. Get the firebaseUID from Stripe:
In Stripe, search for that email, open the customer, and copy the firebaseUID from their metadata.
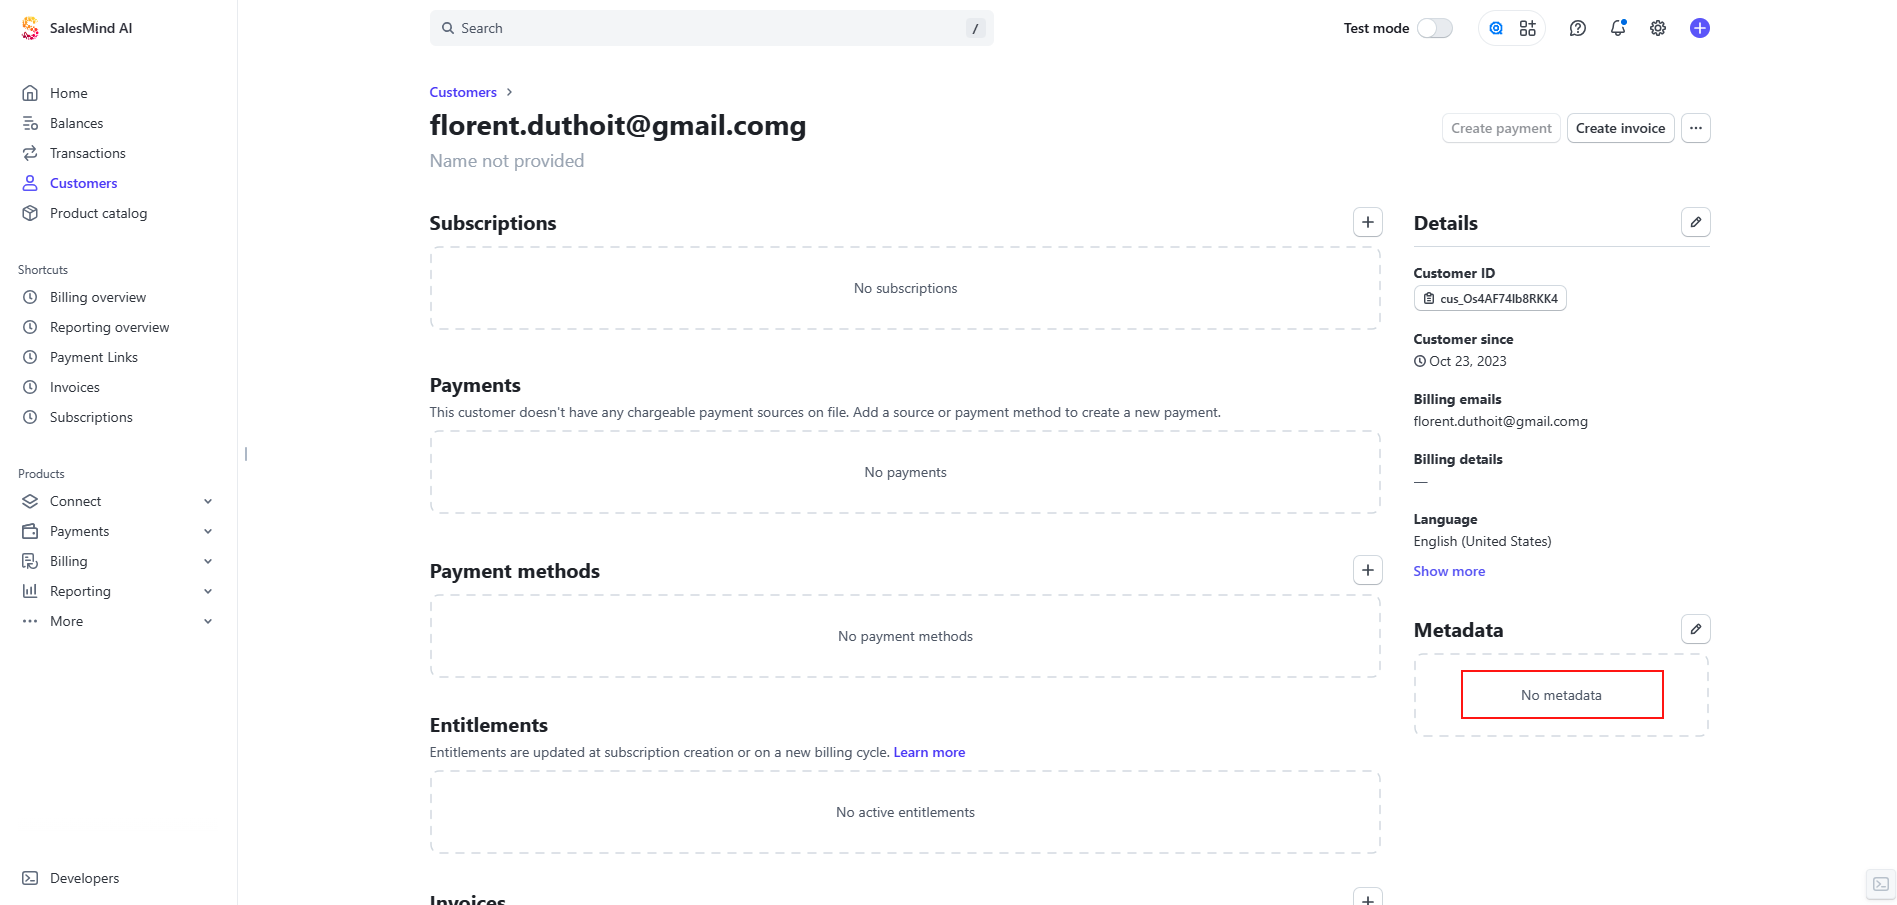
3. Update the payment customer in Stripe:
Search for the email used for payment. Open that customer and check their metadata.
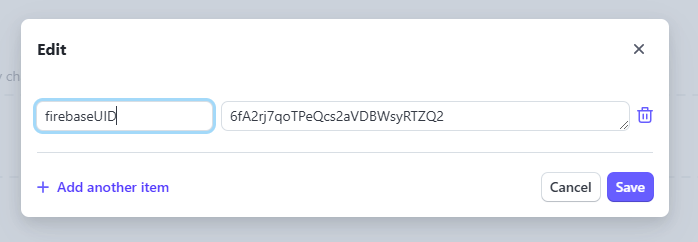
4. Add the UID to the payment customer:
Edit their metadata and add:
- Key:
firebaseUID - Value: the UID you copied (e.g.
6fA2rj7qoTPeQcs2aVDBWsyRTZQ2)
Save.
The subscription seats are now linked to the correct account.
What's Next
- Connect your Intercom workspace to add live support to your White-Label app
- Review your billing page in the app to confirm plans are displaying correctly
- Test a full purchase flow in Stripe test mode before going live